Rebody Mittaws 250 SWB Coupe Build

mittaw

Regular Member
Joined
Apr 1, 2024
Points
13
Hi all

I started my build a few months back and have put some progress to date here. My donor is a 2.8ltr 1998 Z3. Managed to find one in good condition, just over 110k on the clock but in drt storage with good sills and no rust anywhere.

Got the car stripped down in just over a weekend. Tools make the job and save time. Make sure you have all the necessary Torx screwdriver sizes, plus a good magnet to collect those screws that drop in the panels!!

1000014840.jpg

1000014839.jpg


Have the bonnet section mostly positioned right. Just needed to correct a few things and move the power steering coolant loop back to get the bonnet to drop properly.

1000014843.jpg

1000014921.jpg
1000014923.jpg


Bonnet now closes. I need to come back to this in due course to tidy up

1000015029.jpg
 

mittaw

Regular Member
Joined
Apr 1, 2024
Points
13
Roll cage fitted and bolted onto the rear at at the front. Dropped in nicely. I had the rollcage powder coated so it looks good.

1000015061.jpg


Rest of the body then put on for a test dry fit to see what it's like. Looks relatively good

1000015088.jpg


1000015361.jpg

Lots of things to be sorting but the widow gaps to the body are a huge issue to sort out

1000015160.jpg


Will be working on this over the coming weeks but the window frames are off to the chromers to have them stripped and chromed. I've take the original frames apart and sent them off without the glass. Need to wait until they come back to finish the gaps but as it's a 6 week lead in they needed to go off asap.
 

Attachments

Duncodin

Zorg Guru (III)
Supporter
Joined
Sep 8, 2021
Points
139
Location
Krähental
Model of Z
M44 FrankenZed
Keep the progress posts coming. See other people's progress gives me the nudge I need to go out to the garage. I'm almost exactly a year in to my build and stil not finished.

You have a decent size workspace there. That'll help.

I'm looking forward to following your progress.
 

mittaw

Regular Member
Joined
Apr 1, 2024
Points
13
Thanks Duncodin, will do, got a target of next June so lots to do. Yes fortunate to have a bit of space in a unit, but I need to be out of it by June, hence the pressure to get done. What stage are you at?
 

Duncodin

Zorg Guru (III)
Supporter
Joined
Sep 8, 2021
Points
139
Location
Krähental
Model of Z
M44 FrankenZed
Thanks Duncodin, will do, got a target of next June so lots to do. Yes fortunate to have a bit of space in a unit, but I need to be out of it by June, hence the pressure to get done. What stage are you at?
Body panels are on. Door gaps not quite right. No paint. But driving it.
 

mittaw

Regular Member
Joined
Apr 1, 2024
Points
13
Decided I didn't like thr original brake vents so I cut them out and filled the gap with fibreglass patching. Have them where I want for now. Will be finished later. Will be making some bespoke brake vent covers from 3D printer for making a mold and then will create new ones from those. I fee will look better.
1000015466.jpg
1000015672.jpg
1000016670.jpg
1000016671.jpg


Nice cleaner lines I feel. Now need to model up the covers and get them 3d printed.
 

mittaw

Regular Member
Joined
Apr 1, 2024
Points
13
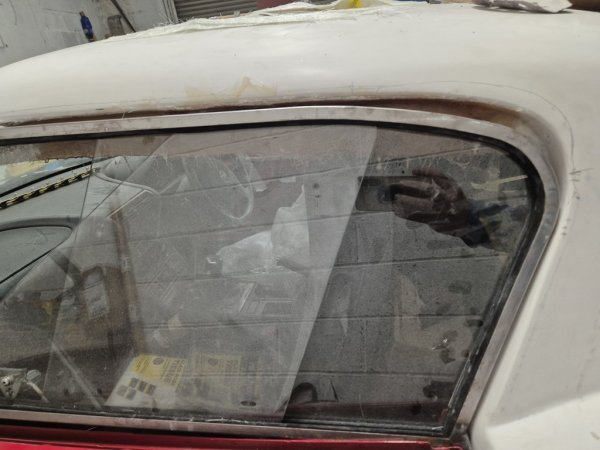
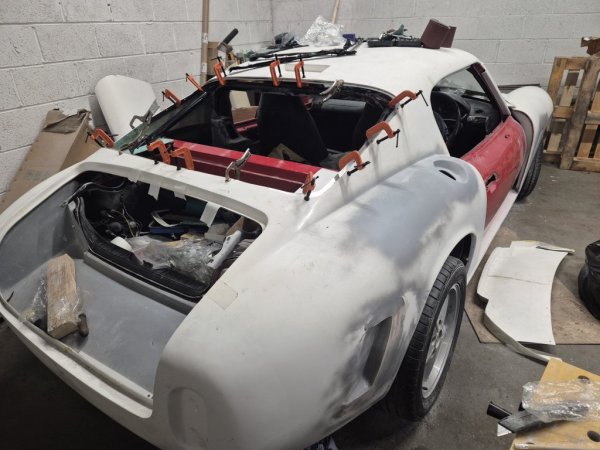
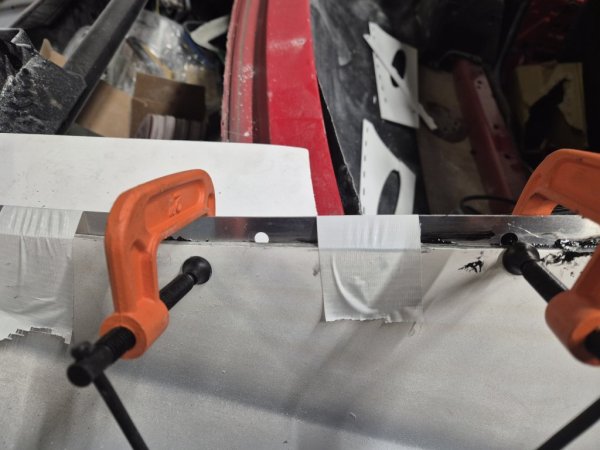
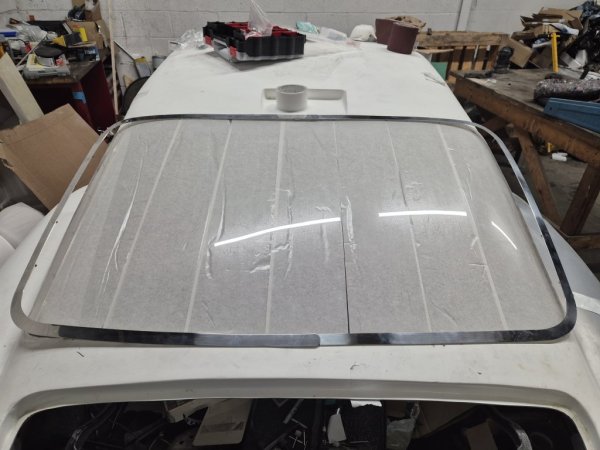
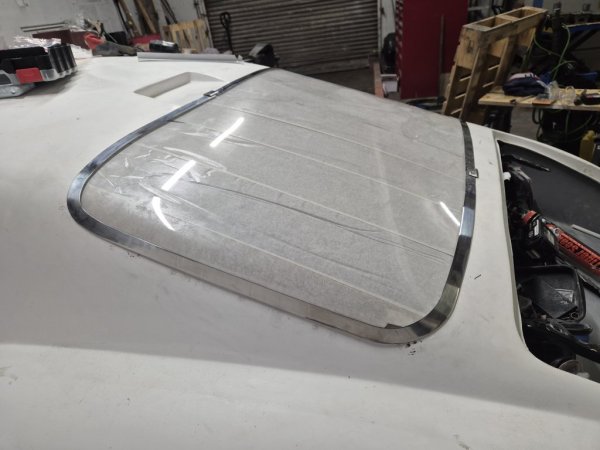
Started to install the Grassbank rear window this week. Have cut out the hole using the guide in the original body mold lines. After cleaning up I've bonded in the metal channels to the inside. Lots of cheap clamps from Amazon. The trim holes are slightly hidden under the body as advised.

On
20241209_181506.jpg
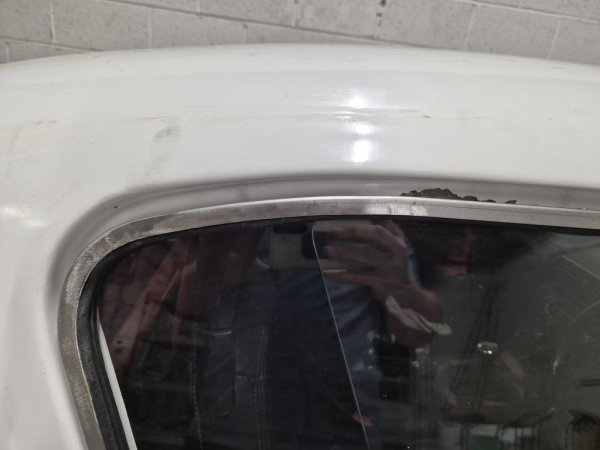
trying the trim afterwards the holes could be further under the bodywork.

The acrylic screen is in place but needs a little trimming. Will continue this week and fix.
 

Attachments

mittaw

Regular Member
Joined
Apr 1, 2024
Points
13
Got the trim sorted today. Not a job for the faint hearted first time around. Takes quite a bit of work to get the screen trimmed to match the cut out, and with the trim detail too. Have got it 90% there. There's still some trimming and shaping to get it sitting on the body flush and correctly. Some small areas where I might need to touch the body up with some filler to get the lines right, but these are minimal. Will try and get if all sitting flush the weekend and get the centre trim sections in place correctly.

Lessons learnt
* get the holes in the trim closer to the body all the way around, some were sat off too much
*Patience...measure, trim, measure, trim, try, measure, trim....repeat
*Start fitting the trim and trimming the screen from the centre outwards and top to bottom before doing the edges, but definitely fit the trim from the side to the middle once all trimmed
*holes in the screen to fit the trim screws through...don't be shy in making the holes as the screen will flex in fitting it
*Fit everything with the body on the car as you need some pressure on it at times, but do the bending and screw fixings with it off if you can as the roll cage is difficult to work around.
*Don't worry about making cuts, measure twice and cut once, but just do it

The kit is really nice but everything needs 'Working' to the body lines and shape of the back. But once done the curved window looks great.

Will need to look at the rear parcel shelf too this weekend so it fits with the window opening.
 

Attachments

Foglem

Zorg Addict
American Zeds
Joined
Nov 14, 2022
Points
46
Location
Ann Arbor, Michigan
Model of Z
M Roadster
I love your last bullet point. Do what you can to measure twice cut once, but in the end you just have to go for it. Indecision paralysis is the worst.
 

mittaw

Regular Member
Joined
Apr 1, 2024
Points
13
100% , you summed it up perfectly!! Things don't happen unless you make them happen and indecisiveness certainly creates paralysis.
 

ruan

Dedicated Member
British Zeds
Joined
Apr 26, 2024
Points
28
Location
Berkshire
Model of Z
3
I am definitely suffering from ... measure, trim, measure, trim, try, measure, trim....repeat... At some point I am going to have to start fixing parts in their final place.
 

mittaw

Regular Member
Joined
Apr 1, 2024
Points
13
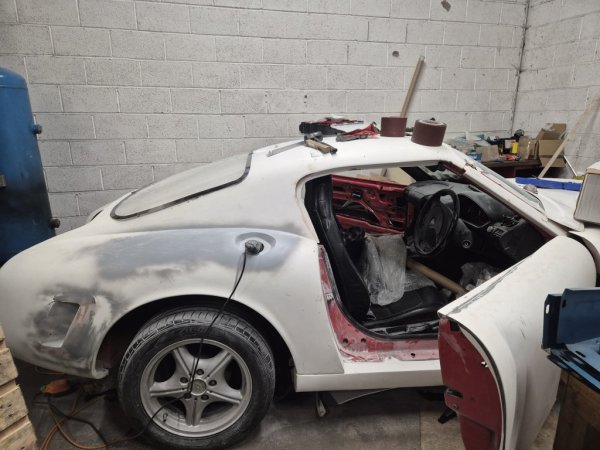
Body on and sitting now to set. Long day getting all trimmed. Fuel filler to the wing was a nightmare I don't want to do again in a hurry. Did if before setting the body but working alone it was very difficult without being able to get the body off with an extra set of hands.

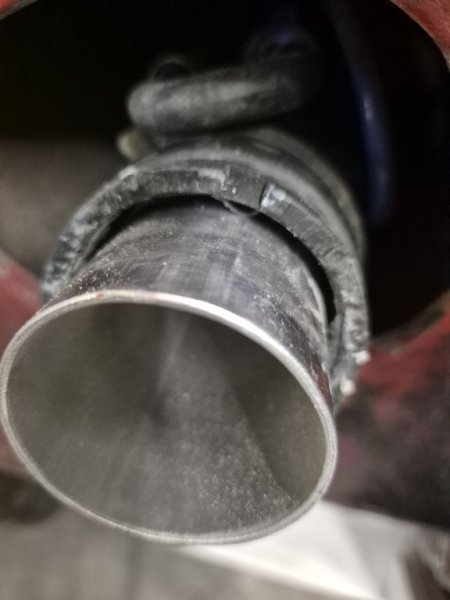
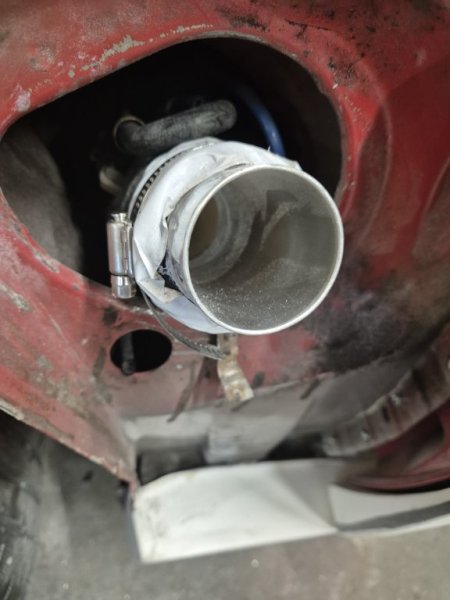
Used a short length of aluminium pipe to insert into the existing filler pipe. Removal of the existing filler section is a fiddly job but a bit of force helped it out. The aluminium tube slides into the existing filler and stops as the existing filler pipe narrows so it has a natural stopping point. I thought about using a larger 90 degree section of fuel pipe that sits over the existing fuel filler pipe but I wanted a more direct fuel travel into the tank and didn't want fuel sat around any join with the bigger pipe. I've seen it done both ways.

I made a gasket out of fuel resistant gasket material to push around the edge then sealed it around the gaps. The gasket will stop any sealant running down the outside but didn't over due it with sealant in any case.

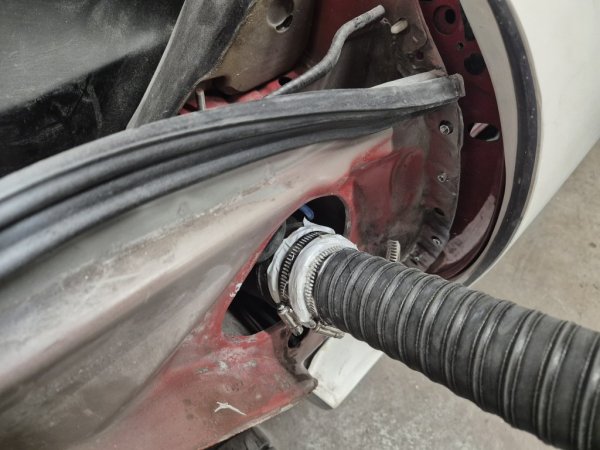
Another home made gasket over the top of the sealant and taped for good measure while everything set. Was tider tha. The image shows in the end. Fitted some flexi fuel filler hose to the aluminium pipe with a little more sealant and then connected that to the fuel cap on the wing. I have to bend back some of the body metalwork so there was no part of it touching the fuel hose.

I attached some old boot rubber to the body just to give some extra protection from metal work. I also put a length of larger thick fuel hose around the flexible section. Ive gone over the top but I just want to be secure.

Also gave the whole rear section of the car as coat of wunderseal to protect the fibreglass underneath from moisture.

Long tricky day but glad to get body bonded onto car. I replaced the bolts and clip holders on the chassis with countersunk rivet bolts and used countersunk bolts to attach the body to the chassis. The countersunk were a helpful tip from another builder and will allow better clearance that the stock bolts for bodyworking.

Sealed all the body to the chassis and left it to set. Rear this week for the main body work, bonnet and boot sections before windows are back from chrome's
 

Attachments

Pond

Zorg Guru (III)
British Zeds
Joined
Dec 26, 2016
Points
144
Location
Spaldingski, Lincs
Model of Z
Z3 project and E89 Z4
Also gave the whole rear section of the car as coat of wunderseal to protect the fibreglass underneath from moisture.
What problems would you anticipate with GRP due to moisture? I was under the impression even bare GRP was completely waterproof.
 

mittaw

Regular Member
Joined
Apr 1, 2024
Points
13
GRP is not totally waterproof unfortunately, especially the underside that doesn't have the gelcoat on it so it needs protecting, particularly from salt water. It's mainly the areas under the wings and under the whole front bonnet shell that need doing, plus the rear under the extended boot panel. But the coating also helps prevent star cracks in the surface paint from small stones that may find themselves flicked up by the wheels too.
 

Duncodin

Zorg Guru (III)
Supporter
Joined
Sep 8, 2021
Points
139
Location
Krähental
Model of Z
M44 FrankenZed
GRP is not totally waterproof unfortunately, especially the underside that doesn't have the gelcoat on it so it needs protecting, particularly from salt water. It's mainly the areas under the wings and under the whole front bonnet shell that need doing, plus the rear under the extended boot panel. But the coating also helps prevent star cracks in the surface paint from small stones that may find themselves flicked up by the wheels too.
In theory it is waterproof but it cracks very easy - stone chips etc - and moisture gets into the cracks and freezes and cracks get worse. Underside needs stonechip protection.
 

Foglem

Zorg Addict
American Zeds
Joined
Nov 14, 2022
Points
46
Location
Ann Arbor, Michigan
Model of Z
M Roadster
I did not know this. What kind of coating/product is recommended? Anything to cover it or more of a sealer?
 

mittaw

Regular Member
Joined
Apr 1, 2024
Points
13
I've used a product called Wunderseal. Thick substance designed for GRP.
 

Pond

Zorg Guru (III)
British Zeds
Joined
Dec 26, 2016
Points
144
Location
Spaldingski, Lincs
Model of Z
Z3 project and E89 Z4
I did not know this.
Me neither. Although GRP IS waterproof by it's nature (it doesn't rot or deteriorate in the presence of moisture) I can see damage can occur easily by debris, so a protection is wise.
UV is much more damaging over time, so maybe we should wrap our cars in factor 50? ;)
 
Top