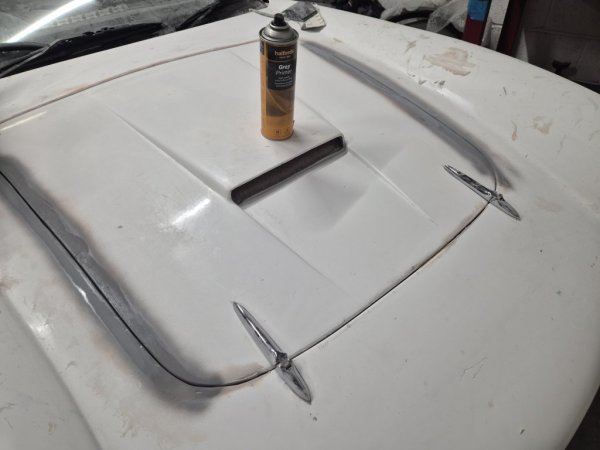
Are you planning on painting the whole of the exterior of front end with stonechip?In theory it is waterproof but it cracks very easy - stone chips etc - and moisture gets into the cracks and freezes and cracks get worse. Underside needs stonechip protection.
Rebody Mittaws 250 SWB Coupe Build
- Thread starter mittaw
- Start date
Sills on this evening. Bonded and fixed. Needed to elongate the holes to enable the best fit i could. Not possible to get bonnet, door edges and sills to all align so just had to go for it aligning all as best together as possible and will make any necessary adjustments in the bodywork
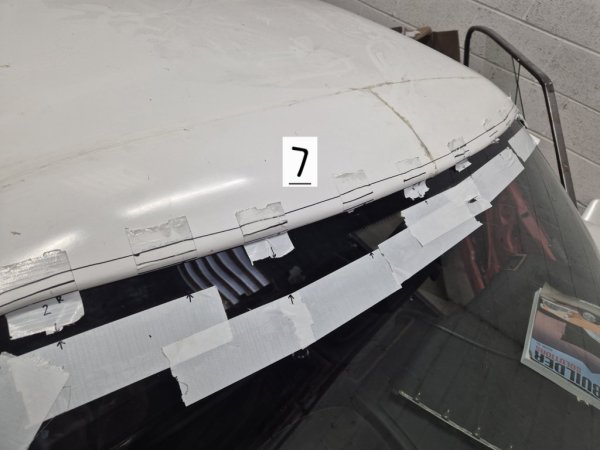
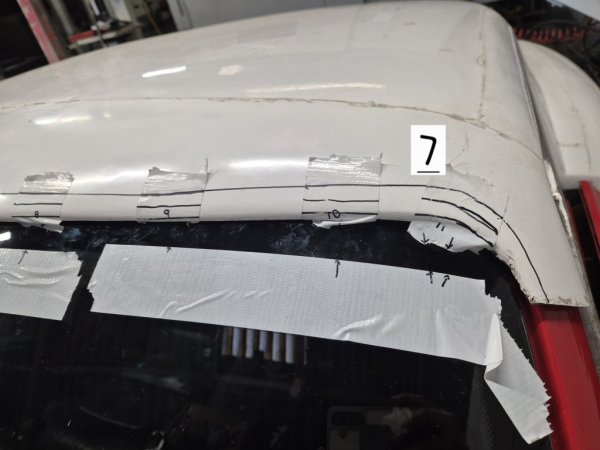
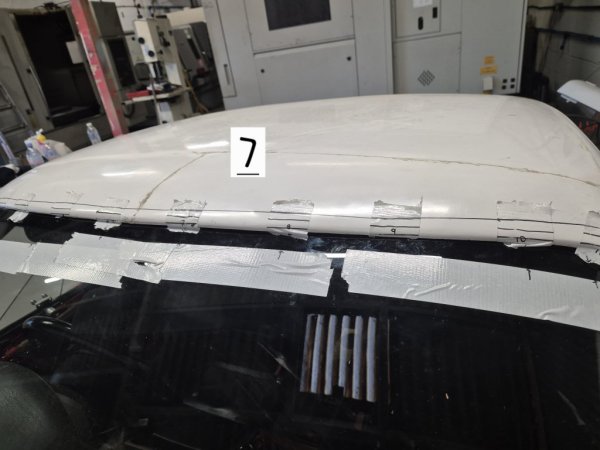
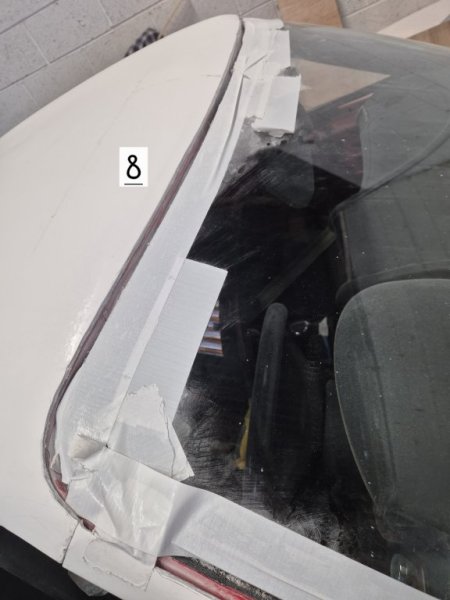
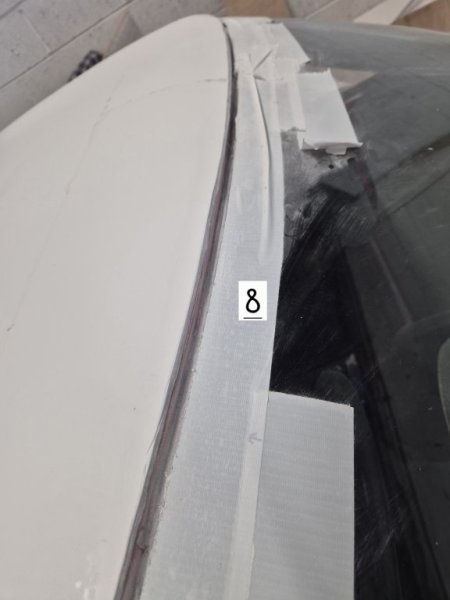
Just a note about fitting the roof on the Coupe, the roof on mine, and many others I understand sits on the original front windscreen. This is ok if you don't want to ever change the front windscreen but I wanted some security in case the windowscreen needs replacing in the future, which it will do as mine has scratches all over it from the previous owner. So I needed to cut the roof line back a little so it sits on the edge of the existing windscreen frame flush enabling me to change the screen now and in the future.
Im sure there are easier ways to do this but i did the following
I should also add that I know all the cars are slightly different as they come out the molds but my roof was particularly low/sagging where it joined the front windscreen so when I placed the filler piece on the front windscreen if lifted the body too high off the chassis elsewhere, particularly the side sections and the part that bonds to the sill behind the door.
I tried cutting this long piece down a bit but it got to the point where it was just the same height as the window frame so it became redundant. So I never used it in the end and everything elsewhere sat perfectly. I've backfilled the void across the windscreen from the interior with some fibreglass matting to give some extra strength to the bond between the roof and the windscreen frame.
I will also need to reshape the roofline as it looks like this section is made from three sections of the mold and mine hasn't come out strictly true.
Just a note about fitting the roof on the Coupe, the roof on mine, and many others I understand sits on the original front windscreen. This is ok if you don't want to ever change the front windscreen but I wanted some security in case the windowscreen needs replacing in the future, which it will do as mine has scratches all over it from the previous owner. So I needed to cut the roof line back a little so it sits on the edge of the existing windscreen frame flush enabling me to change the screen now and in the future.
Im sure there are easier ways to do this but i did the following
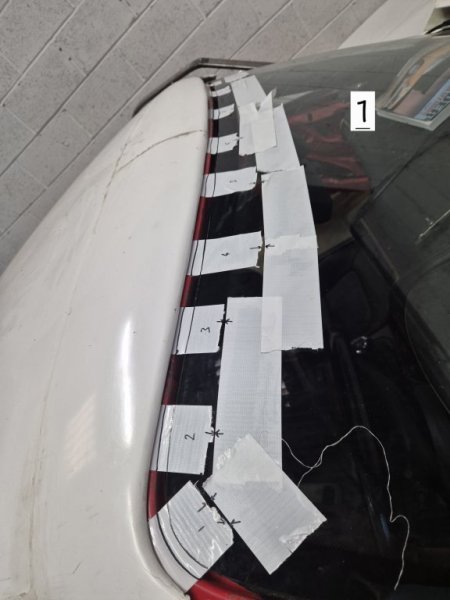
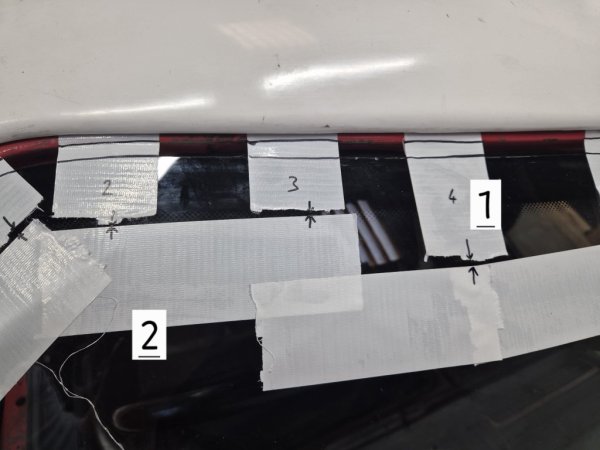
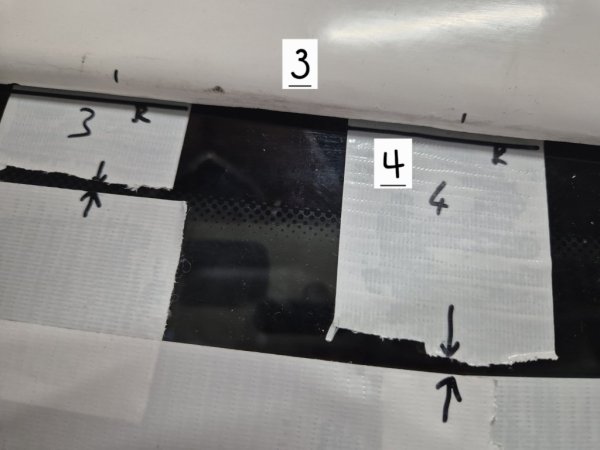
- I placed a series of peices of tape on the window, numbered them and marked the edge of the window glass and the edge of the metal frame.
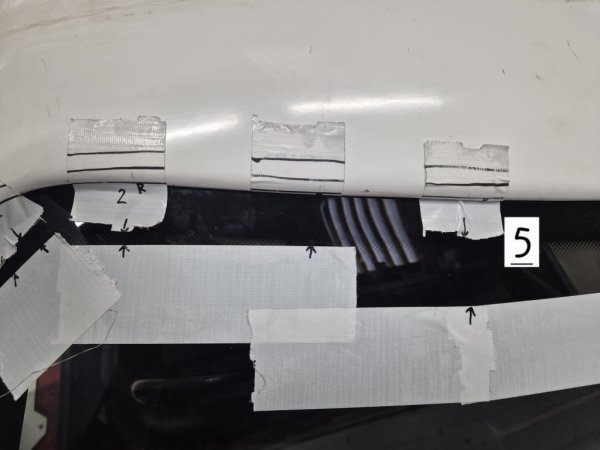
- Placed some second tape below them and drew a line with arrows to allow me to realign them later when I put them back on
- Put the body on the car so it sat on the car as I wanted it everywhere else but right across the windscreen
- Then with the roof over the glass I marked up on the tape a third line where the roof line sat now
- I then removed the body again and took off all the individual pieces of tape and put the body back on again
- I then put the tape piece back on, but this time on the roof not the windscreen aligning the third mark i made with the edge of the roof and the arrowson the othertape. This showed me how far back I had to cut back the roof so it met with window frame where the original rubber sat
- I marked roughly the line between the pieces of tape across the window with the furthest back line
- I then cut the roof back on the furthest back line which when I removed the section I cut off the roof line matched the original windscreen edge. It wasn't 100 percent but it was pretty close. I could then use some wheelarch chrome trim to bridge the windscreen and the body to give a really nice flush line against the body and the windscreen but importantly allow the window to be removed in future without having to harm the bodywork.
I should also add that I know all the cars are slightly different as they come out the molds but my roof was particularly low/sagging where it joined the front windscreen so when I placed the filler piece on the front windscreen if lifted the body too high off the chassis elsewhere, particularly the side sections and the part that bonds to the sill behind the door.
I tried cutting this long piece down a bit but it got to the point where it was just the same height as the window frame so it became redundant. So I never used it in the end and everything elsewhere sat perfectly. I've backfilled the void across the windscreen from the interior with some fibreglass matting to give some extra strength to the bond between the roof and the windscreen frame.
I will also need to reshape the roofline as it looks like this section is made from three sections of the mold and mine hasn't come out strictly true.
Attachments
-
57.5 KB Views: 99
-
93 KB Views: 122
-
80.6 KB Views: 107
-
81.7 KB Views: 110
-
94.4 KB Views: 107
-
96.1 KB Views: 118
-
97.9 KB Views: 106
-
59.4 KB Views: 110
-
40.4 KB Views: 113
I'm going to paint the underside of the whole front bonnet section with it yes. Not the exterior side. I'd rather just over do it than under do it. Just never know where water may get over time.Are you planning on painting the whole of the exterior of front end with stonechip?
I'm not going to do the removal bonnet section as that will be on show when it's open. For that I'm applying a flowcoat to give a smooth finish to the rougher underside.
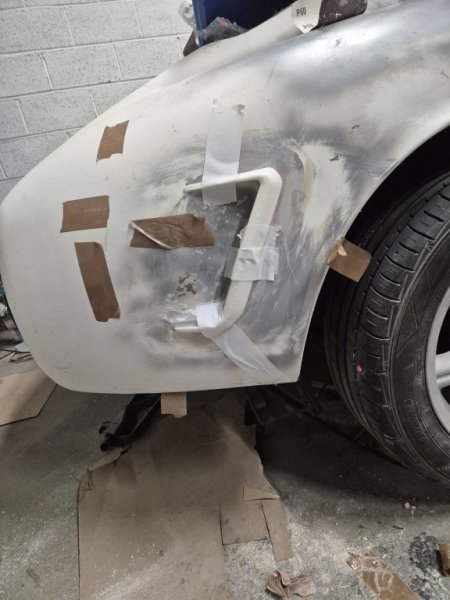
I've smoothed out a lot of the joins between the two GRP panels around the edges with some P40 and a small amount of P38 to smooth it off. I wanted to be able to open the bonnet and have the underside as good as the topside. Will post up some images when I've finished the underside and the bonnet scoop extension.
Busy few days to get as much done before Christmas break. Working on the sills and joining the panel gaps.
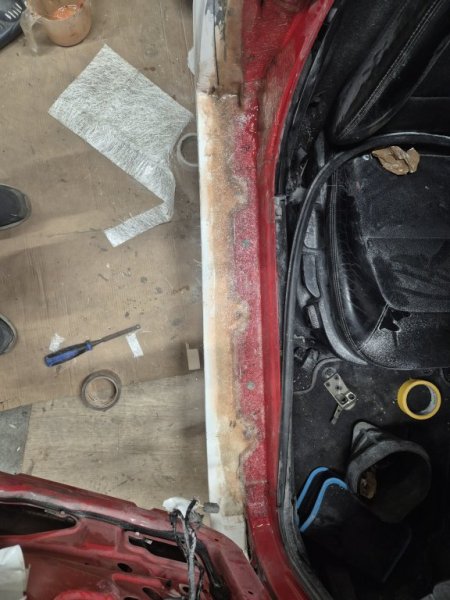
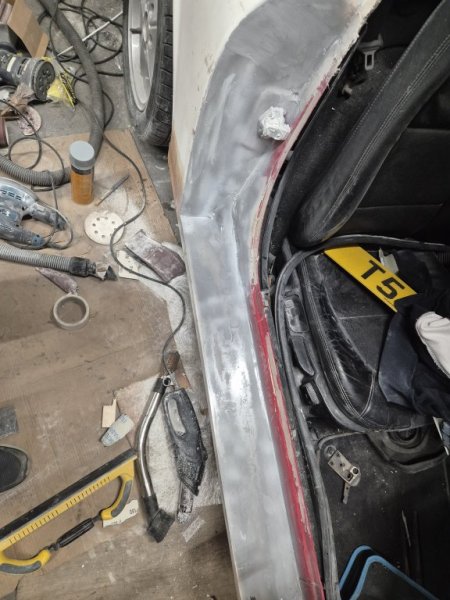
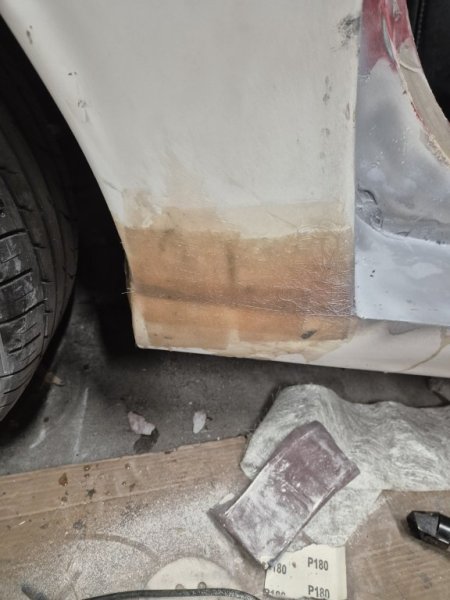
Replacement sills have been bonded in place with tigerseal and seam sealant. Over the top of that is a layer of glass fibre filler. The one for deep holes. This packed out the gaps to get it all level-ish. Once that had dried, a layer of fibreglass matting was placed all over the joins and sills panel to strengthen the join. Once sanded and leveled a layer of filler was put on top and sanded back. A draft layer of primer was sprayed over it all once sanded back to give a guide coat for later finishing.
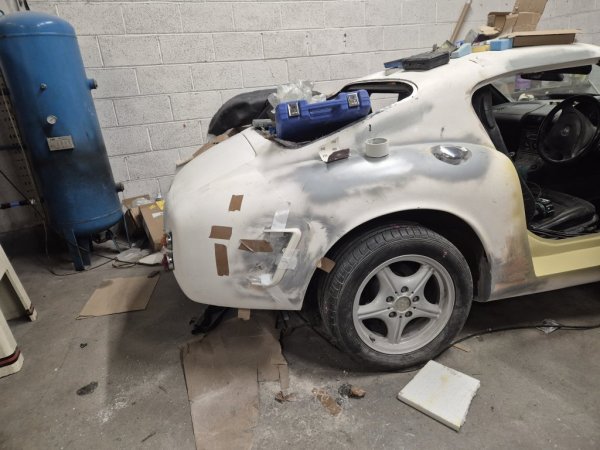
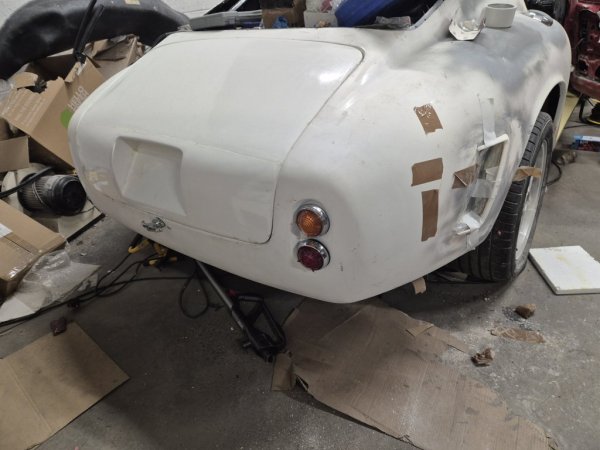
Next up joining the sill to the rear panel to create a seamless join between the two panels. I filled the gap between the panels with tigerseal, and the some glass fibre filler to add strength to the join. To stop any cracks between the panels from movement i then overlaid this with a few layers of fibreglass matting. I also bonded a stainless steel brace behind the panels in the wheel arch and covered with fibreglass matting and filler to hide it. I need to sculpt the the wheelarch a little as a result. A very thin layer of p40 glass fibre over this. Will sand this back and a thin layer of top filler over that will smooth it all off.
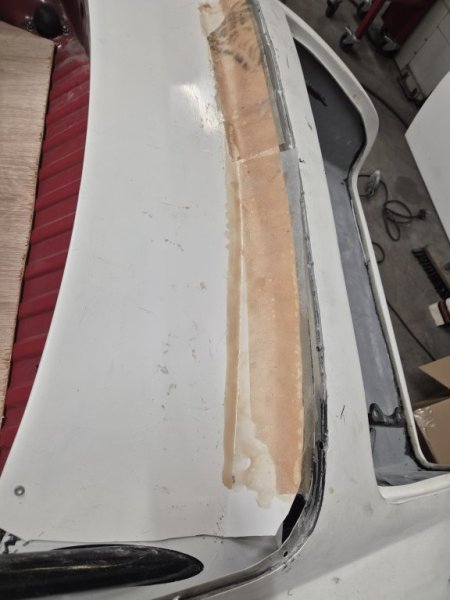
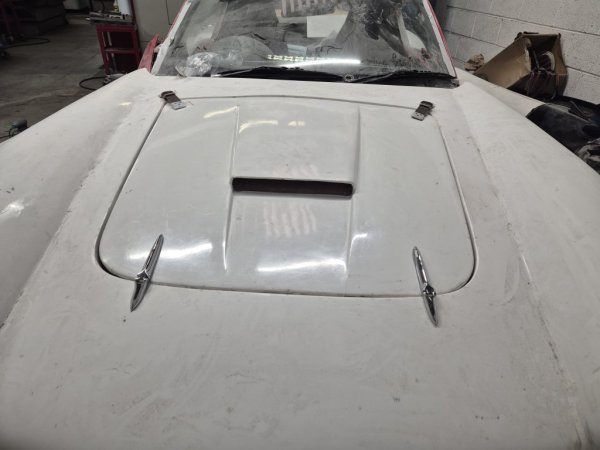
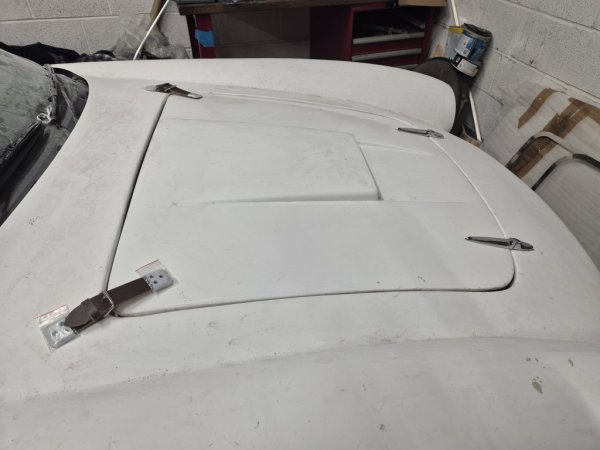
Focus then onto the bonnet. TR4 hinges in place and bonnet opens nicely now. Leather bonnet straps prepped and ready to be fixed. Juts playing with the angles a bit before I fix. Now I have the bonnet in place I can see how far off the bonnets alignment is with the body....and it's quite a bit. I'll need to work up the shape of the bonnet to match the body later as well as some big variations on the panel gaps around the bonnet.
Ive also fixed the rear shelf in place. Ita a revised one thats a lot bigger as it came with the Grassbank rear window. It's been trimmed back and some fibreglass matting attached to it reaching back under the body. I need to do as much of this as possible before the car is painted and rear window gets fixed in as I have the access now while the window is not in place. Plan is to get painted in Feb/March so best to do now.
Window frames are due back from the chromer in Jan so need to get all door sills done this week as the roof will need reprofiling to match them, and generally. It all needs to be done by May 2025 so pressure is on.
Attachments
-
101.4 KB Views: 133
-
105.5 KB Views: 125
-
73 KB Views: 125
-
61.1 KB Views: 127
-
94 KB Views: 124
-
89.5 KB Views: 130
Oh. That's a lot of permanent FG bonding of FG panels to steel. I'd worry it would crack along the joins. But I guess that's the way your kit is meant to be fitted.
On my 507 kit the FG panels, sills etc are just bolted on to the chassis like the originals using the same screws into the same thread holes. The screw heads are then covered by the original trim.
On my 507 kit the FG panels, sills etc are just bolted on to the chassis like the originals using the same screws into the same thread holes. The screw heads are then covered by the original trim.
Yes, I've kind of gone to town on it all. The sills fit the same way as your 507 kit but i wanted the car to have a smooth look along all the door openings. It will have some polished aluminium trim over the top later.
Cracking is a worry but I'm hoping it doesn't happen, but there will be the trim over it in anycase.
Cracking is a worry but I'm hoping it doesn't happen, but there will be the trim over it in anycase.
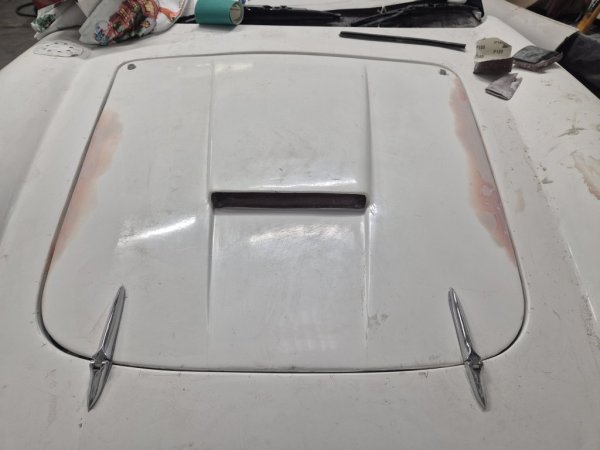
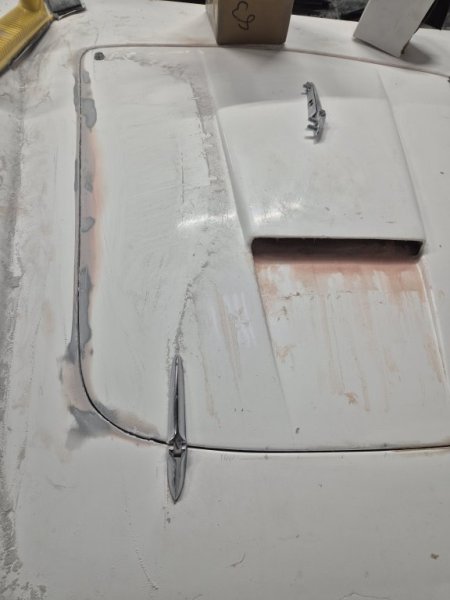
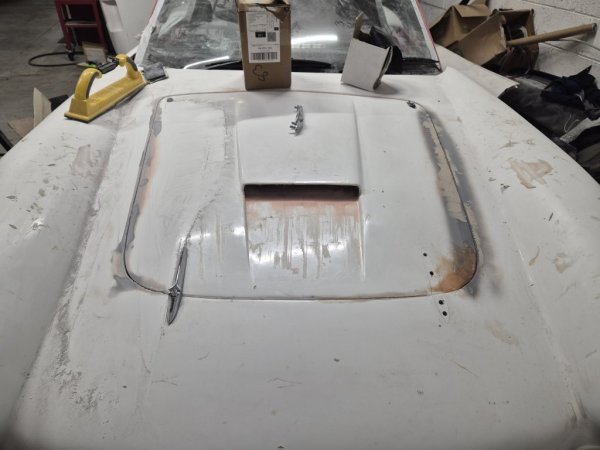
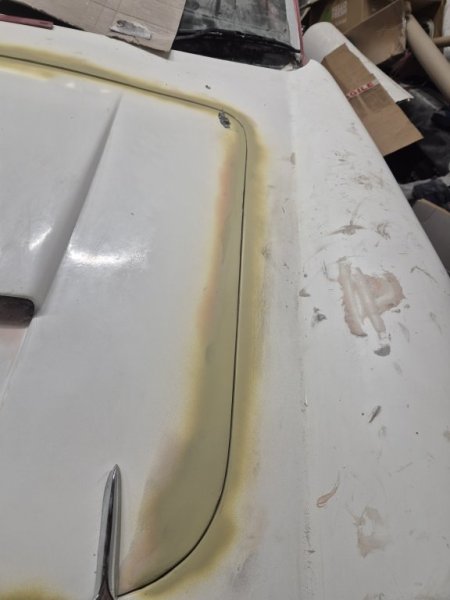
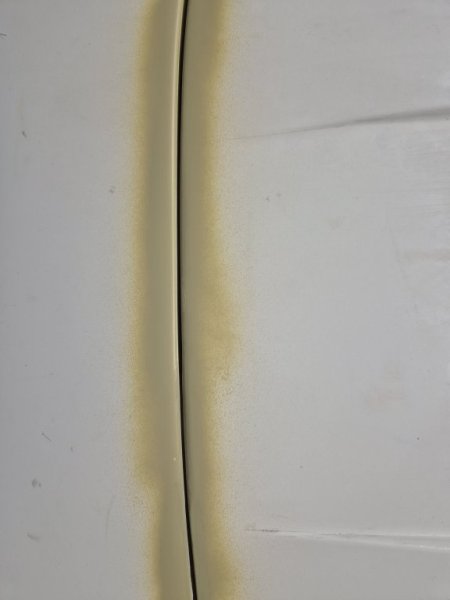
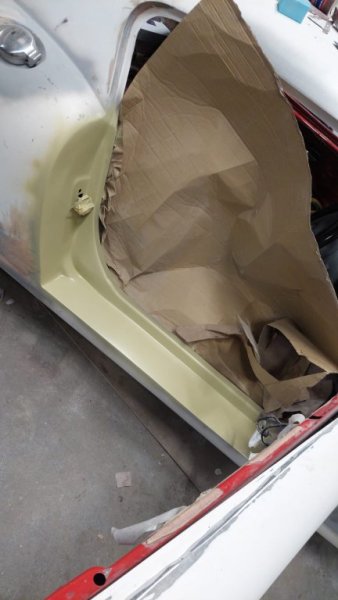
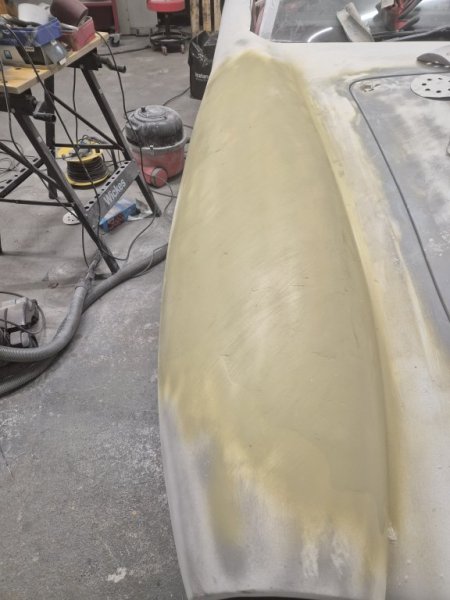
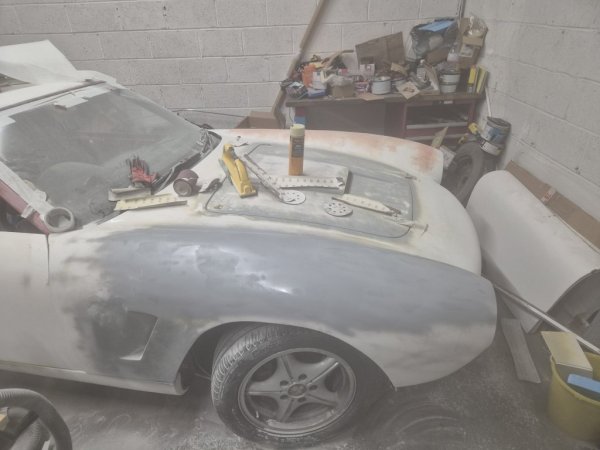
Front end Monday today. Working on the bonnet and panel gaps. The gaps around the edges were huge so have worked the body and bonnet with fibreglass and some light bodyfuller on top. Lots of shaping to go yet but the yellow primer over the top is showing where its getting to.
Will have a day of fettling tomorrow to flush it all up and tidy underneath
The bonnet was also not aligned well to the front end sides so ive had to slightly reshape them to make them align. Ive also put two washers under the supports at the top underneath. Ive got two bolts fitted into a rivetnut each side with a bump stop on them to allow me to raise and lower the bonnet sitting position to get the profile as best I could before looking at the wider profile of the bonnet fit.
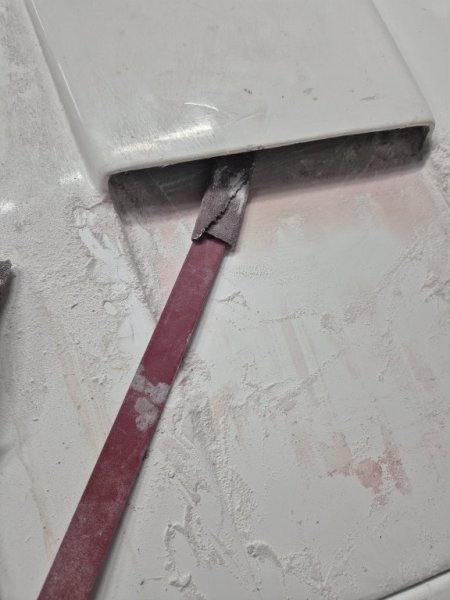
Ive also reprofiled the air scoop with it extended into the bonnet, and sanded using a metal bar. Might have to shorten the length of the scoop for painting but will sort that later.
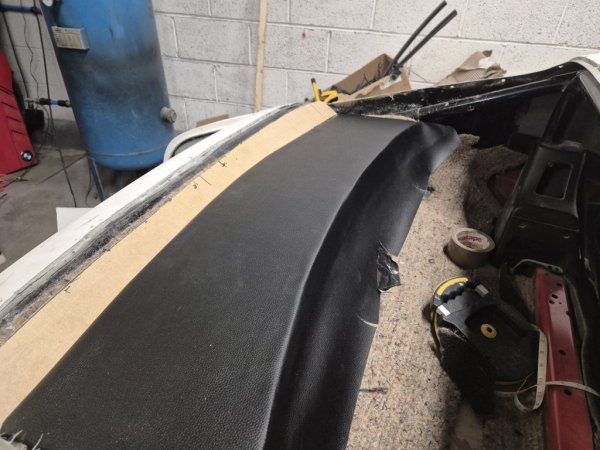
Also started the rear parcel shelf upholstery while the front end was drying. I'm trying to get ahead of the game with the rear parcel shelf while the rear window is out. Its covered in vynil and laid over some fire retardant bitumen backed noise damping material. I'll finish that off as a filler job while waiting for other bits to dry.
A good days progress but nearly a whole day on the bonnet alone. Will hopefully advance it tomorrow and get the scuttle panel in position
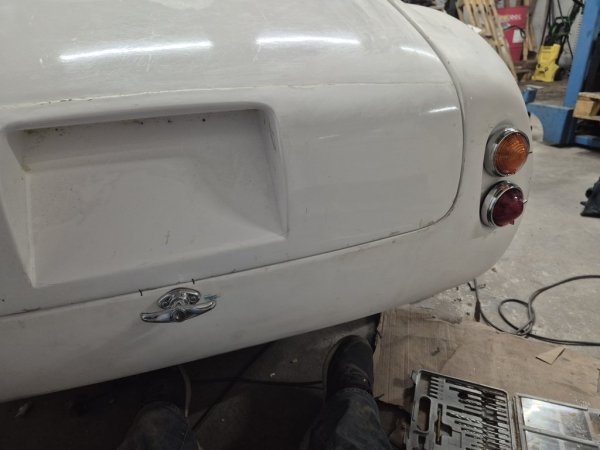
The boot is also not looking great but that's for another day once I've got the latch on it sorted.
Attachments
-
82.8 KB Views: 117
-
80.4 KB Views: 113
-
49.2 KB Views: 110
-
101 KB Views: 120
-
46.6 KB Views: 114
-
31.8 KB Views: 114
-
72.5 KB Views: 119
-
160.5 KB Views: 111
Last edited:
You have been busy over the Christmas break, I am working my way forward from the rear tub, so I want to finish the doors before I sort out the bonnet, had a break from it over Christmas, back to it on 6th January.
Windows back from the chromers have been delayed so still working on the front and rear ends as well as the door inners. The bonnet needs some fettling still and rounding of the panel edge gaps so they are not so sharp.
The sills are looking better but the cold weather is slowing down the process. Quite a few pinholes in the prep but it's going to sprayshop for 4 weeks for painting in a heated booth, so have been told to leave all that for the professionals later.
Have started to work on the rear end putting the lights in place temporarily for locating them. Got all the connectors on order for next week. Have tested the rear stop tail and indicators and they work. Was a bit worried about the electronics but am working through it slowly and logically. I labelled all the connectors when I disconnected them in the strip.dowm. I just need to connect them to the right wires on the loom in due course.
I like the Lucas style lights on the rear. Need to work out the fog and reversing light next, as well as linking up the rear reversing camera to the reversing light. Not sure where to hide that just yet.
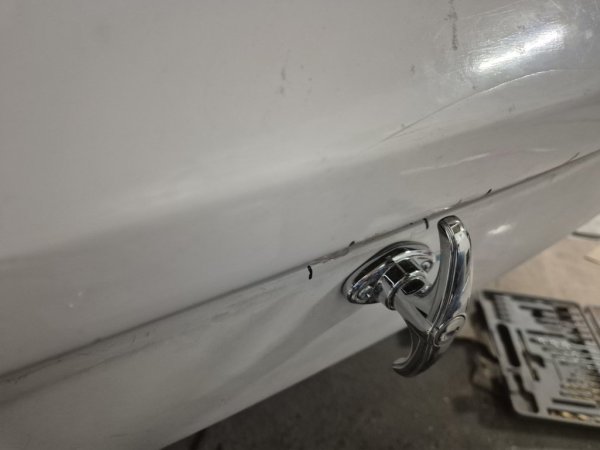
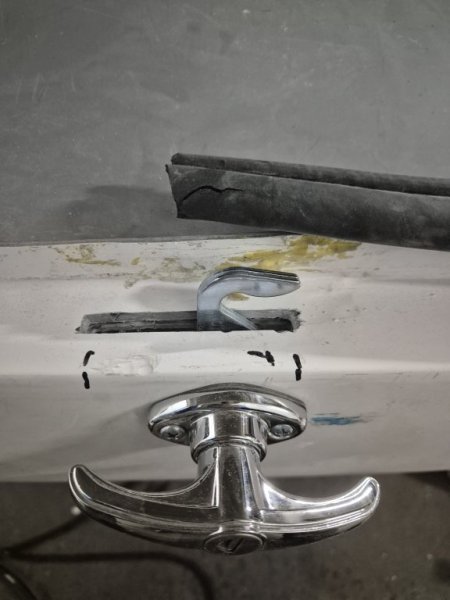
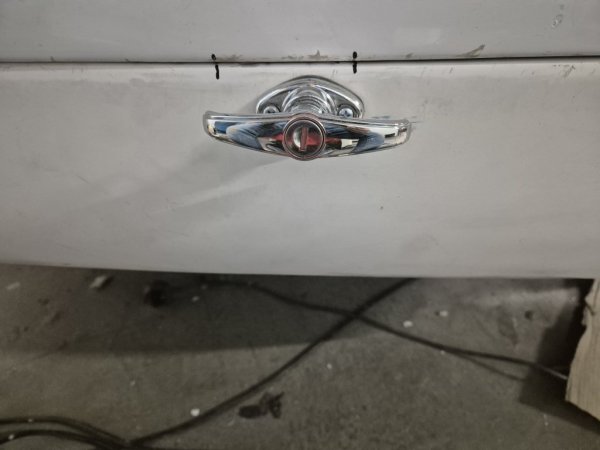
Rear boot claw latch in place. I have decided to use a manual lock and handle at the rear so that I can get into the boot if the car deadlocks. I was advised on this by another builder and it looks sensible to me.
The latch took some working out but have it positioned well in the rear ledge of the boot before the rubber trim. Ive secured this underneath with some L shaped stainless steel brackets. Ill then fix this to the body and fibreglass it in place for extra strength. Ill get a photo of that later. The boot lid has a catch that comes down for the claw latch. It all took some measuring and use of phone camera in the boot but it catches nicely now.
Key with the latch and handle is to make sure that when the handle is turned the boot clears it when opening. Ive heard this can be an issue but mine has cleared. More luck than judgement I think, but happy that it does.
The boot shape on the body is not symmetrical and off by quite a bit, plus the boot lid will need reshaping across the top and sides like the bonnet to match the body profile. I'd rather reshape the boot than the body as the body profile fits the profile of the Grassbank rear window l, so I want to leave all that lone if possible.
Attachments
-
51.5 KB Views: 119
-
92.5 KB Views: 107
-
62.8 KB Views: 112
-
58 KB Views: 105
-
72 KB Views: 108
I'm kind of regretting taking the tribute brake vents off to make my own, but I didn't like the standard ones on the kit.
I've designed some of my own style using 3d software. I didn't want to replicate the F style and have 3d printed a draft set out of my own to see what the fit looks like. The measurements match the internal vent shape but I'm not sure on the look yet. Ive made them slightly undersize as I'll be using them to layer fibreglass sheet over to make the actual vent. This is the mock up using pla. Not 100% convinced.
I did mock up a set on the body of the car using clay from which i was going to make a mold, but the weather is just too cold and the clay is taking days to set. Not a bad thing as shrinkage is reduced but its still too soft to work with.
I'll continue with the printed approach and see where I get. Ive got a few weeks yet to get right.
Attachments
-
80.6 KB Views: 100
-
153.8 KB Views: 103
-
119.4 KB Views: 111
Last edited:
This week is still on the front end. Windows are back from the Chromers and look great. They will be reassembled over the next few days and covered with protective wrap so they are not damaged during the build.
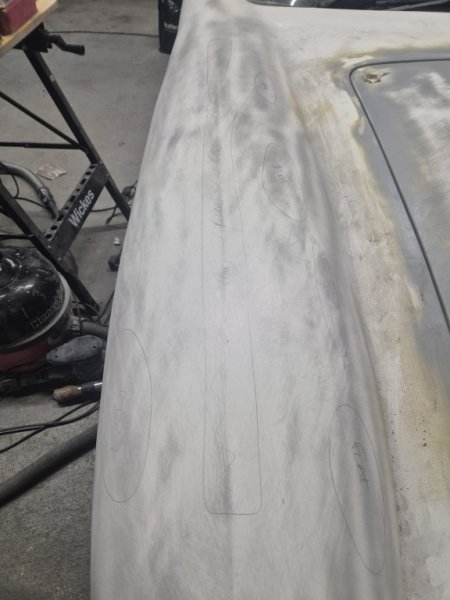
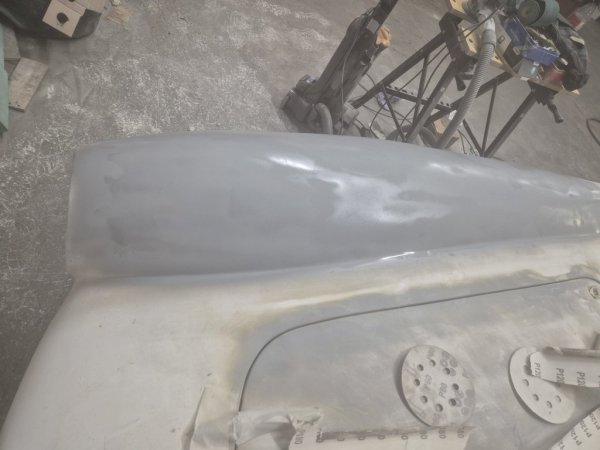
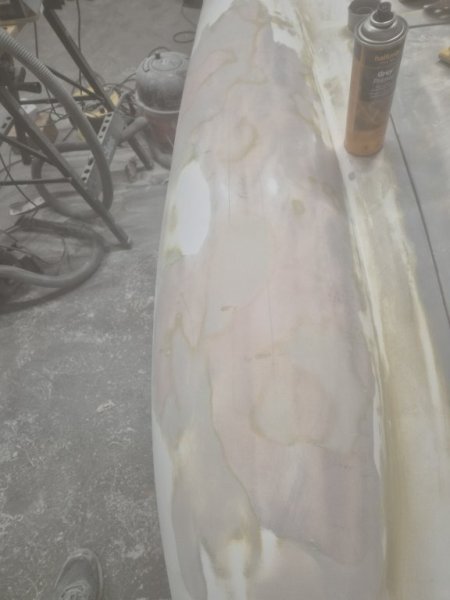
The front end need quite a bit of work over the front wings. There are ridge lines at the panel joins and numerous flat spots all of which need working. I marked them up to guide the work.
While there is a lot of work to do I think it is worth saying here that we should really appreciate all the work that Chris and the guys at Tribute have done to get the kits created. Yes there's work to be done but the base is a great start.
I've used a couple of guide coats of primer and a long block to sand down the body and filler. Im trying to avoid using as much glass fibre filler abd body filler as possible but im also trying to keep the GRP body thickness too. The primer guide coats really help identify the high and low spots with the long sanding block to manage the shaping.
There's still more to do on the first wing. It's been about 5 hours work on this one so far. I reckon its got another 2-3 hours before I'm comfortable. I'll prep the other side later this week. I need to try and have both sides and the bonnet ready by the end of the weekend if I'm to stay on track.
Hope to get to the A pillars, door opening gaps and part of the roof line next week....fingers crossed
Attachments
-
64 KB Views: 105
-
76.6 KB Views: 106
-
103.6 KB Views: 105
-
101.7 KB Views: 105
-
48.4 KB Views: 101
I am at about the same place, however I have only taken off the ridges along the joints, so I guess I need to take a closer look at the panels to see if they need further smoothing off. Agree with your comment about Chris and Dan at Tribute, I am very pleased with the quality of my kit.
Dxbolton
Zorg Guru (II)
Hi Ruan, you will have a flat spot on the front wings where you removed the ridges. So far we all have. Mine were only minor and easy to rectify.I am at about the same place, however I have only taken off the ridges along the joints, so I guess I need to take a closer look at the panels to see if they need further smoothing off. Agree with your comment about Chris and Dan at Tribute, I am very pleased with the quality of my kit.
Dxbolton
Zorg Guru (II)
Looking good. I’m enjoying watching the progressThis week is still on the front end. Windows are back from the Chromers and look great. They will be reassembled over the next few days and covered with protective wrap so they are not damaged during the build.
Only minor? Mine (right side) is massive. I think it'd need a layer of filler over an area of 15x30cm around 15mm thick to 'round it off'.Hi Ruan, you will have a flat spot on the front wings where you removed the ridges. So far we all have. Mine were only minor and easy to rectify.
Having said that - Looking at it from all angles though I'm beginning to think it isn't the top of the wing that's low. I think it's the area to the right (outer side) of the flat spot that bulges out kinda making the plateau. Sitting in the driver's seat looking over the wing I see a distinct lump sticking out. I'm reluctant to slap on a pile of filler when (maybe) I should be taking some GRP off
And yet everyone seems to pile on the praise for Tribute's skill and quality?Only minor? Mine (right side) is massive. I think it'd need a layer of filler over an area of 15x30cm around 15mm thick to 'round it off'.
Having said that - Looking at it from all angles though I'm beginning to think it isn't the top of the wing that's low. I think it's the area to the right (outer side) of the flat spot that bulges out kinda making the plateau. Sitting in the driver's seat looking over the wing I see a distinct lump sticking out. I'm reluctant to slap on a pile of filler when (maybe) I should be taking some GRP off
From what I've read and seen on here; they don't seem to be very good mouldings at all.
I just don't understand it.
It seems that the 'flat spot' issues are well documented (on here at least), yet Tribute haven't addressed them and still churn out mouldings with the same issues. Or am I wrong?
I think you're correct. I've been relooking at mine and there is definitely an issue with the outerside on the right. Ive got to find the right line along that edge. Otherwise running my hand along the top of the wing it feels nice to have a constant feel to it.Only minor? Mine (right side) is massive. I think it'd need a layer of filler over an area of 15x30cm around 15mm thick to 'round it off'.
Having said that - Looking at it from all angles though I'm beginning to think it isn't the top of the wing that's low. I think it's the area to the right (outer side) of the flat spot that bulges out kinda making the plateau. Sitting in the driver's seat looking over the wing I see a distinct lump sticking out. I'm reluctant to slap on a pile of filler when (maybe) I should be taking some GRP off
From my perspective the outputs are rough and the boot is way out. I haven't got to that yet but as a starting place they are good. It depends on what you're expecting I guess. I was advised before I got the kit they are rough and need a lot of work so knew what I was in for and am happy to do it. I guess if you aren't aware then there's more to worry about.And yet everyone seems to pile on the praise for Tribute's skill and quality?
From what I've read and seen on here; they don't seem to be very good mouldings at all.
I just don't understand it.
It seems that the 'flat spot' issues are well documented (on here at least), yet Tribute haven't addressed them and still churn out mouldings with the same issues. Or am I wrong?
The other option I looked at was making my own body buck but on a cost/time balance the kit was the best option hands down. It's a start, not an end and I'm enjoying making it. It's part of the charm.
Each to their own I guess.
Very impressed about this build and you seem to be progressing with pace.
I am still waiting for my kit but this is good to know.I have also heard that the height of the headlamps are different (right headlamp is higher than left).
Not sure if you have seen this.
I am still waiting for my kit but this is good to know.I have also heard that the height of the headlamps are different (right headlamp is higher than left).
Not sure if you have seen this.
Last edited:
Good luck with your build when the kit arrives. It's good fun. Thanks for the heads up on the lights. I was planning on getting to this the weekend so I'll look into the height issue and report. As for pace yes, my target is June finish for a trip to Le Mans in it. Might bea close call....Very impressed about this build and you seem to be progressing with pace.
I am still waiting for my kit but this is good to know.I have also heard that the height of the headlamps (right headlamp is higher than left).
Not sure if you have seen this.

